Hello to all my blogging friends, I hope this post finds you all well and happy!
Yippee! It's Friday and that means it's Sketch Frenzy Friday Time!
Stacey Tomkowiak designed our sketch this week and boy it's a fun one. Thanks Stacey!
Here is her sketch,
This is what I cam up with from it,
I have been wanting to use some of my new Stampin' Up goodies that I purchased from the pre-order a few weeks ago. Pre-order purchases are one of the perks of being a Demo (hint hint, hint) Now is a great time to join !!!! Ever since March I felt compelled to try to use up some as much of my retiring items before I tore into my new goodies. But, I couldn't hold out any longer and this sketch was perfect to show off many of my new goodies.
The DSP is called Maritime and the Stamp Set is called Sea Street. I wanted to have an aquatic scene in the background and this paper really helped fill that space. The Night of Navy die cut piece of card stock behind the cute little red octopus really made his image pop! I cut out one of the little flags from the DSP and attached it to one of the octopus tentacles so that the he could wave his Birthday Greeting to the recipient. I think he is such a cheery little fellow.
Now let's take a look at the inside.
I had a few little pieces of DSP left over so, I added them to the little strip of DSP at the bottom of the inside of the card for additional interest. I also stamped a school of fish behind the Birthday Greeting to give the greeting some dimension.
Supplies I used to create this card.
Card Stock- Whisper White, Real Red and Night of Navy.
Ink- Real Red Night of Navy and Blushing Bride.
Stamp Set- Sea Street, By The Tide and Itty Bitty Banners.
Framlits- Bitty Banners and Window Frames Collection.
Punch- 3/4" Circle.
That's all there is for this card. I hope you were inspired and get to create a card from this terrific sketch. If so please load it onto our blog we would love to see it! Here is our link http://www.sketchfrenzyfriday.blogspot.com/
Have a great week chat soon,
Patrice
Thursday, May 29, 2014
Friday, May 23, 2014
VC Rocks Blog Hop 2014
Hello Rockers and to all my blogging friends,
I hope this post finds you all well and happy!
Yippee! It's our first VC Rocks Blog Hop of the summer and I am so excited to be a part of this wonderful group of crafters that I created something super special for you. What do you think about some Blog Candy? Just leave me a comment at he end of this post and I will have a random drawing for it???
I made a really special desk gift set for you today. I hope you enjoy it. A tissue box and a gift card.
Let's take a look at each piece one at a time. How about the card first.
I really love to make this type of card. I call it a double fold with a matching belly band.Maybe it is called a gate fold I am not sure?
Here is a look at the inside, and how it looks with out the belly band. If you cut the belly band on one side you could re-use it as a Book Marker so it could be as a sort of an added gift inwith this gift set.
Now for the Tissue Box Holder.
What about a closer look, humm????
and a side view,
All products to create this Gift Set are from Stampin' Up of course (smile).
I chose to use my favorite color combination for this project, Basic Black and Brights. The polka dot band and the top piece are from the Modern Medley DSP pack. This DSP pack is soon to be retired (Boo Hoo) I just love this paper! The flowers were made from a scrap of the Modern Medley DSP. The card stock flowers are Tempting Turquoise, Real Red, Daffodil Delight, Melon Mambo and the leaves are Old Olive card stock. I had a few Beige Lace Roses left over in my stash and thought they would look great in between all the other flowers and you can not have a bouquet with out butterflies all around right!For the final touch I made a Black 1/8" Taffeta Ribbon double loop bow that I snuggled inside the bouquet for fun.
My favorite flowers to make when I need some flowers are what is called the Scrunchy Flowers technique. I love that SU's card stock(CS) is perfect for making these types of flowers because when the CS is scrunched and slightly damp it separates in half and has a soft look to the leaves which makes for really pretty flowers. I have a tutorial some place on my blog and I made a Make N Take for VC Rocks several years ago on how to make them? But if you are interested in learning to make these flowers now I would be more than happy to show you. There are all kinds of new flower techniques around that most people don't use this technique any longer, but it is still my go to technique.
I want to thank you for stopping by today and visiting My Little Patch of Dirt this weekend. I will have a random drawing on Monday for this set. So leave me a comment and a way to contact you just in case your the winner.
Please continue on our blog hop by clicking this link http://vcrocks.blogspot.com/2014/05/MayBlogHop.html
Chat Soon,
Patrice
Thursday, May 22, 2014
Sketch Frenzy Friday 05/23/14
Hello to all my blogging friends, I hope this post finds you all well and happy!
YES! It's Sketch Frenzy Friday time! I really have to say this is one great sketch. Not easy to be sure, but it really packs a punch! There are so many different ways in witch this sketch can be constructed. I had to go through a huge list of options (color combinations, focal images...) in my brain when creating my card. This time I went for the CAS version of it.
Robin Messinheimer created our sketch this week. Thanks Robin for giving my brain a work out lol.
Here is her sketch,
and this is what I came up with,
The sketch allows for the sentiment to have a staring roll with lot's of POP! I chose this DSP because I feel the polka dots makes the card have a happy celebratory feel to it. I also think it is a great compliment to the sentiment.
Here is a look at the inside,
Supplies I used to create this card.
Card Stock- Whisper White, Lost Lagoon and Hello Honey.
Ink- Lost Lagoon
DSP- Moon night Paper Pack.
Stamp Set- Yippee Skippee and Really Good Greetings!
This was a very fast card to create and used minimal supplies which is great if you are a new stamper. The style is called Clean and Simple (CAS).
Thanks for stopping by today. I hope you have a great weekend and find some time to create something fun. Please give Robins sketch a try and post your card on our blog so we can see what you came up with. Here's the link
http://www.sketchfrenzyfriday.blogspot.com/
Until next time.
Chat soon,
Patrice
Wednesday, May 21, 2014
I had some time to create this week.
Hello to all my blogging friends, I hope this post finds you all well and happy!
I have been in a stampers card club for several years now Here are a couple cards I created for the gals for the months of May and June.
May's card is for a technique
The card above was a fun tech that I found on Split Coast Stampers using an Embossing folder and re-inkers and a spray bottle.
June's card is anything but a standard fold card. So I came up with a double fold with a belly band. I think it turned out really pretty. I put a simple lace rose on the belly band that dressed up the card and made it look very special.
That's all for today I thought I would share these cards with you and hopefully give you some inspiration!
Have a great day and I hope you too find some time to create something fun.
Chat soon,
Patrice
Friday, May 16, 2014
Sketch Frenzy Friday 5/16/14
Hello to all my blogging friends I hope this post finds you all well and happy!
Wow, time flies when you are having fun! I am almost done with all the gardening I need to do this spring??? So now I will have lot's more time to stamp. YIPPEE!!!!
But in the mean time I do slip into the studio and create some fun things!
This weeks sketch was created by Elizabeth. It is a really lovely sketch and can make for really spectacular cards. You should give it a try. Here is Elizabeth's sketch
and this is what I came up with.
I cut out two of the Cup of Tea images with medium Framelit ovals. One just for the sentiment that I colored in and outlined. The second I stamped totally in Strawberry Slush. I cut out the colored sentiment portion free hand and mounted that with Dimensionals on to the solid colored image. I really felt that this extra step set off the pretty image. I wanted the card to look very delicate (Tea Party-ish) so I added the pretty bow with a little banner in Wisteria Wonder. Lots of Embossing to create a lovely and soft feel to the card. With the addition of a few little pearls on the flowers just set it off nicely.
Now for a peek at the inside.
Supplies I used to create this card.
Card Stock- Whisper White, Wisteria Wonder, So Saffron and Pink Pirouette.
Ink- Wisteria Wonder, So Saffron and Strawberry Slush, Pistashio Pudding and Baked Brown Sugar
Stamp Set- Feels Good and Tea Party.
Framlits- Ovals and Bitty Banners.
Embossing Folder- Delicate Designs and Fancy Fan.
Misc.- Basic Pearls.
Well that's all there is to it for this week. I hope you do join us and create a card from this sketch. If you do, please add it to our blog here so we can see it! http://www.sketchfrenzyfriday.blogspot.com/.
Chat soon,
Patrice
Thursday, May 15, 2014
Garden in Bloom
Hello to all my blogging friends, I hope this post finds you all well and happy!
This is part two of the photos I took last week of My Little Patch of Dirt WV.
This is what I look at when I open the back door (Our Entrance). I took this new photo now that the mulch is down. It is so beautiful I just love this focal piece of our yard. The birds love the bath too.
These are Marion-berries ready for planting.
Here they are in the ground.
The strawberry patch before
and now it is planted. They are really happy. There are 28 of them.
It is amazing to see this strawberry patch because there was a big mound of dirt that was covered in grass when we moved in. Jeff and I thought it was a tree root that we might have to dig up but it wasn't, just a big pile of dirt in the middle of the lawn? Nice that we didn't have too much hard work to get this patch Right!
The Onion, Herbs and Sweet Potatoes are planted and doing good.
I had to dig up this big patch of grass first. We will have Red, Yellow and White onions, they are already popping up. There is also Sage, Cilantro, Parsley, Sun Flowers, Oregano and Tarragon.
We planted... Jeff Dug all the Big Holes YIKES 2'x2' and there are 6 of them.
1-Peach Tree
1-Cherry Tree
1-Asian Pear
1-Bartlett Pear
1-Golden Delicious
1 Red Apple (I forgot the type)
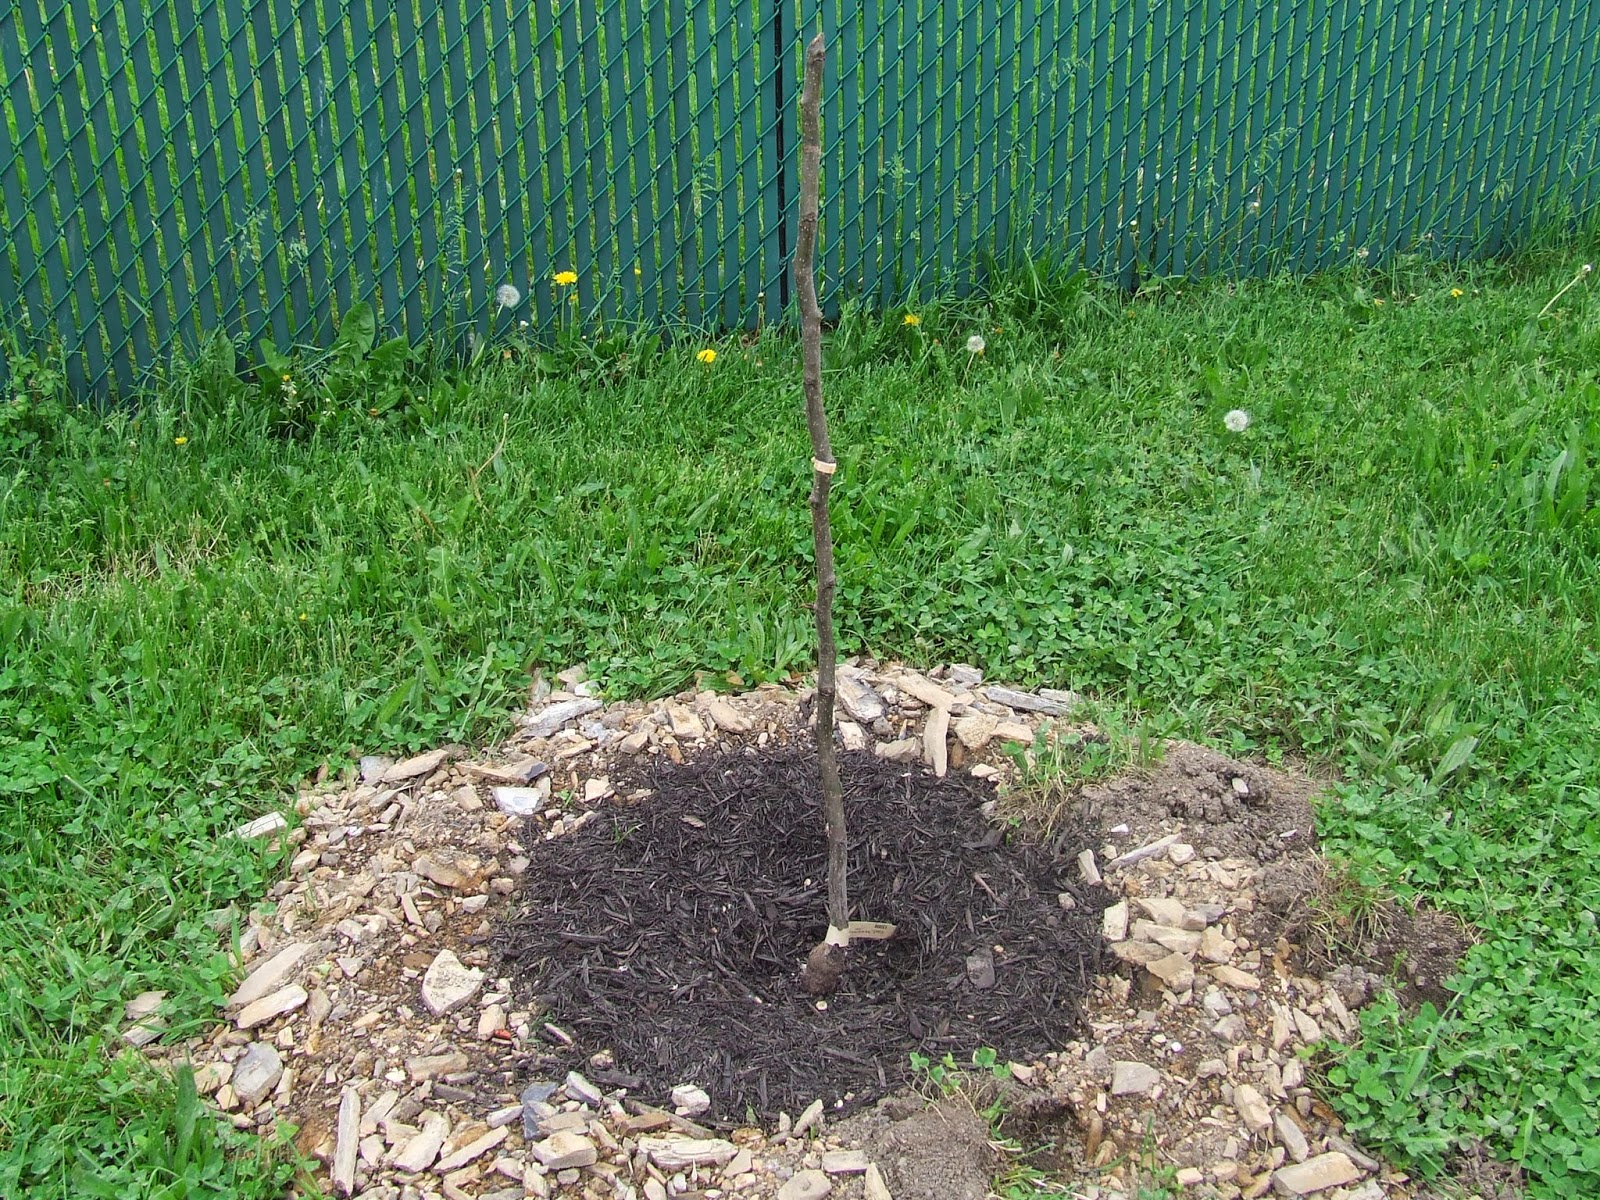
Here are the pictures of them, we go out every evening and see if any leaves have popped out. We call it walking the property hehehe.
Notice how big the property is (Well big for us just under a half acer) in the city limits is quite a find.
We also planted Raspberries, and Blue Berries here they are (Remember the Marion-Berries earlier) We are going to have quite the orchard in the next few years. Hopefully all this hard work will pay off.
Blue Berries
Raspberries
There are three of them but I also wanted to show you the Lilacs that we planted a few weeks ago. We can't grow Lilacs in So Calif. like they grow them here in the East., so I am soooo excited to have them now in our yard.
We also have Peonies growing I can't tell you what that means to me I am tickled pink or white or red??? I'm not sure what color they will be, but time will tell.
Twenty years ago when I worked at a Flower Shop I used to sell a single stock for $3.00-$5.00 each. I sure hope they bloom.
Already here when we moved in was an Apple Tree and a Huge Concord Grape Vine. I cut it back quite a bit at the end of last summer when we moved in I was hoping it would be good for it and I was right. We have one arch but we need to get the second one up really soon. This vine is really growing fast.
Can you see all the little grapes already forming.
Now for the existing apple tree. It is fun to see all the little apples growing. I'm going to have to look up to see how to grow the fruit properly because we have so many new plants to take care of.
I've registered for a WV Master Gardener course that starts in August that I am very excited about, but I kind of wish I already knew what to do with all these new plants????
I guess I will have to call the WVMG group to see if they make house calls??? To make sure I am on the right track.
That's enough for today I'll get a few more pictures in my next post.
Chat soon and happy planting.
Patrice
Thursday, May 8, 2014
Sketch Frenzy Friday 5/9/14
Hello to all my blogging friends, I hope this post finds you all well and happy!
OOPS! I tried to do something different with scheduled posting and I must had made an error! Sorry I am late.
Thank goodness for SFF it's always a pleasure to get my fingers inky! This weeks sketch was designed by Kim Innis and what a beautiful sketch it is.
Take a look at this.
This is what I came up with.
I really like the Doily in the background. I will really hate to see this Die retire.
The scrunched ribbon was a fun touch I think.
Here is a look at the inside.
Supplies used to make this card.
Card Stock- Paper Pumpkin Grey, Coastal Cabana and Basic Black.
Ink- Basic Black Crushed Curry and Coastal Cabana.
DSP- Eastern Elegance
Stamp Set- Mixed Bunch and Petite Pairs.
Punch- Blossom
Misc.- Basic Pearls, Paper Doily Sizzlits and Daffodil Delight Seam Binding Ribbon.
That's all there is to it to this card for this week. I hope you join us this week and create something fun. Just remember to show us what you make. http://www.sketchfrenzyfriday.blogspot.com/
Have a great week .
Chat soon,
Patrice
Planting My Little Patch of Dirt!
Hello to all my blogging friends. I hope this post finds you all well and happy!
I bet you have been wondering where I have been off to?I've been out in the garden landscaping planting flowers and veggies. I have a few pictures to share with you.
Jeff on his mower and the planter outside the back door.
Hay bale gardening - There are 5 bales in each section.
Now they are almost all planted.
I put two hanging baskets on the front and the back of the rows of bales.
Two planting beds
We planted Azaleas, Iris and Petunias. Next year or so it should be really pretty.
This is my Strawberry circle I'll plant that tomorrow. I will have a strawberry tower in the center once it is planted. I have to do the onions and potatoes first.
I'll be back with better photos I am on my way outside now gardening in a never ending job.
Chat soon Patrice
Thursday, May 1, 2014
Sketch Frenzy Friday 5/2/14
Hello to all my blogging friends, I hope this post finds you all well and happy!
I have been sort of under the weather this week. I don't know what it is maybe allergies or some king of bug. So, sorry for not posting as much as I had lately! I am sure I will be back in the craft room soon.
With the Special SU Event on Monday and the Pre Order it has been a great Stampin' Up week!
I am so glad it is Friday and it has stopped raining. I can't wait to get back in the garden and plant the rest of the veggies and flowers we purchased last weekend.
So without further ado, let's get on with the show! This weeks sketch was designed by Jennifer Kay and what a great sketch it is!
This is what I made from it,
What a pretty card this sketch created! It was a challenge to measure every thing to get the circle centred and the edges to line up properly by hand. But I think it turned out as I had wanted it to.
Now here is a look at the inside,
Supplies used to make this card:
Card Stock- Whisper White, Coastal Cabana, Pear Pizzazz and Crushed Curry.
Designer Series Paper- Eastern Elegance.
Ink- Coastal Cabana and Crushed Curry.
Stamp Set- Secret Garden and Blessings from Heaven.
Framlits- Secret Garden.
Embossing Folder- Delicate Designs.
Punch- 2 1/2" Circle and Bird Builder
That's it for me this week. I hope you were inspired and find some time to create something fun also. If you do please share it with us, we would love to see it. Just add it to our blog here http://www.sketchfrenzyfriday.blogspot.com/
Chat Soon,
Patrice
Subscribe to:
Posts (Atom)